Original Article
Back to Microsoft Dynamics CRM Overview
The CRM e-mail router is available for implementation with Exchange On-Premise, POP3 accounts, and Exchange Online. In this article my focus is on implementing the E-mail Router with Exchange Online.
For additional information regarding other available options and supporting resources, please see my article,
CRM Online E-mail Router – Yes We Do That!
So let’s get started. To begin, you’ll want to ensure you understand the hardware / software requirements. These were pulled directly from the E-mail Router Installation Guide:
- Windows 7, Windows Server 2008
Next, you’ll want to consider a few configuration options and make decisions:
- How do you want to handle Incoming mail for each user?
- How do you want to setup the Outgoing Mail Profile?
Incoming Mail Options
You have a couple of options regarding the Incoming Mail Profile; do you want to have the e-mail router handle both outgoing and incoming or do you want to use the Forward Mailbox for Incoming. The benefit for using the Forward Mailbox is that you have only one point of failure to troubleshoot incoming mail issues, the Forward Mailbox. If each user is configured to use the E-mail Router to manage incoming e-mail then you might have to troubleshoot issues at the Outlook user mailbox level. The downside to this approach for some is it requires an additional mailbox setup for the Forward Mailbox and Rule Deployment to manage the forwarding mail process. The upside is that it scales well as organizations grow.
Additionally, you’ll need to decide if you are going to setup one Incoming profile for each user or use one Incoming Profile for all. The most common approach is to use one Incoming Profile for all users. If that is the choice you make then the Access Credentials you choose to use for this profile must have full access to all user mailboxes. If you choose to setup one Incoming Profile for each user then you will need to know the Exchange Online password for each user.
Outgoing Mail Options
The option you want to focus on for the Outgoing Mail Profile is do you want to use an Administrator level account for Access or setup each user account. Generally, you’ll want to use an Administrator level account for Access rather than setting up individual Outgoing profiles. An Administrator level account assumes full rights to all user’s mailboxes. There will be some important items to pay close attention to when setting up this configuration to include a required call to Exchange Online support to complete a few configuration steps which I’ll highlight later in the article.
After you’ve identified the best configuration options for your organization and completed the preparation work required for the options you selected, you are ready to install the e-mail router.
E-mail Router Installation
One of the best resources I’ve found for a detailed guide on installing the E-mail Router for CRM Online and Exchange Online is the article written a few years ago on the Dynamics CRM Team Blog,
Configure Microsoft Dynamics CRM Online E-mail Router with Exchange Online
Although some of this will be a repeat of the above article, the following steps are from a ‘real-world’ installation, so here we go:
First, ensure your CRM users have been configured to use the E-mail Router.
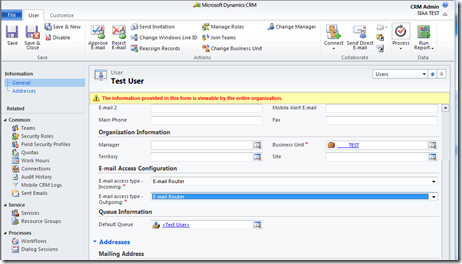
- Go to CRM Online, select Settings, Administration, Users, select each User and update the E-mail Access Type Incoming and Outgoing fields under the Email Configuration section.
- Also ensure you’ve that you’ve selected the Approve E-mail button from the Ribbon.
Now we are ready to install and test the E-mail Router
- Download the CRM 2011 E-mail Router and run the installation package. You can choose from a 32 or 64 bit package depending on your machine setup.
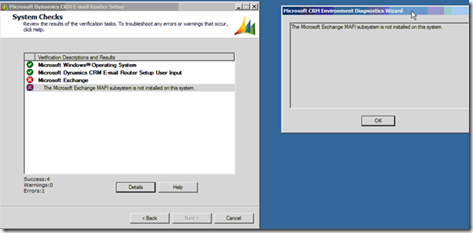
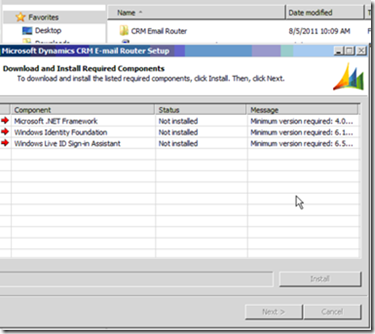
- Select to Install any prerequisites required
- If you receiground-image:none;padding-left:0px;padding-right:0px;display:inline;padding-top:0px;border:0px solid;" alt="UserImage" src="http://edwardsdna.files.wordpress.com/2011/09/userimage_thumb.png?w=462&h=264" />
Now we are ready to install and test the E-mail Router
- Download the CRM 2011 E-mail Router and run the installation package. You can choose from a 32 or 64 bit package depending on your machine setup.
- Select to Install any prerequisites required
 KB article for the fix
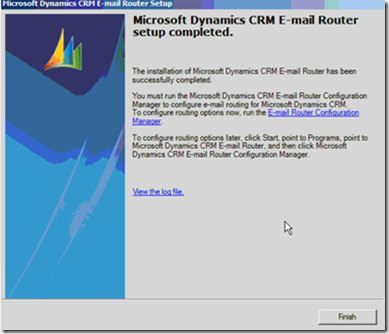
- If you needed to apply the fix, select back once the fix is applied and select next. If no errors were encountered, select finish if the installation completed successfully. If the installation did not complete successfully, you need to resolve all error before proceeding.
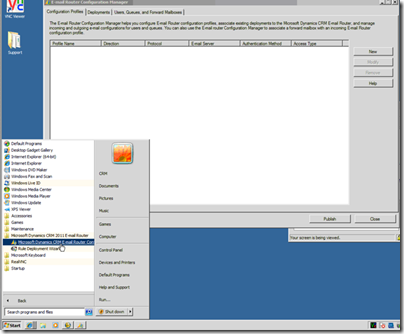
- Next you’ll go to Start Programs, Microsoft Dynamics CRM 2011 E-mail Router and open the Configuration Manager
- Remaining on the Configuration Profile tab, we’ll create the Incoming and Outgoing profile. You may not need both depending on how you plan to use the e-mail router.
Outgoing Profile
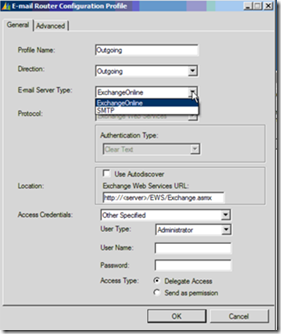
- Enter a Profile Name, Select Outgoing for the Direction and Select Exchange Online from the E-mail Server Type
- Enter the Exchange Online Web Server URL which can be found in the Configure Microsoft Dynamics CRM Online E-mail Router with Exchange Online article and documentation.
- Select Other Specified for the Access Credential, select Administrator for the User Type and enter the credentials of an Exchange Online Administrator account
- For Access Type, select the desired option.
- Note: the difference between Delegate Access and Send as Permission is Delegate Access causes e-mail to display “Sent on behalf of (specified CRM User)” and Send as Permission causes the e-mail to appear as though it was sent directly by the CRM User
- Note: from the documentation: “The Send As setting is currently not enabled by default for the Exchange Online Administrator. Please call Exchange Online Support to update the setting. This may change with future releases”
Incoming Profile
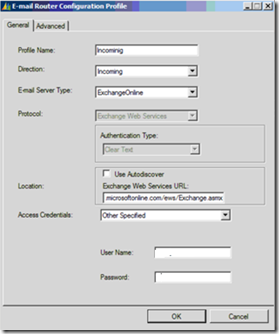
- Enter a Profile Name, Select Incoming for the Direction and Select Exchange Online from the E-mail Server Type
- Enter the Exchange Online Web Server URL which can be found in the Configure Microsoft Dynamics CRM Online E-mail Router with Exchange Online article and documentation.
- Select Other Specified for the Access Credential, select Administrator for the User Type and enter the credentials of an Exchange Online Administrator account
Deployment Profile
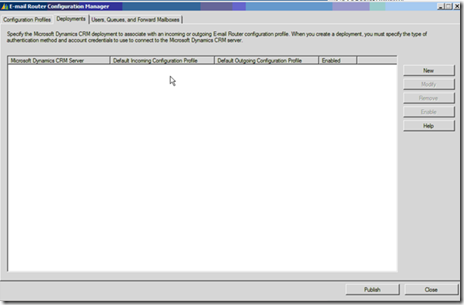
- Select the Deployments Tab and select the New button from the right navigation menu
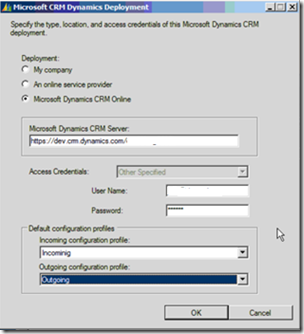
- Select Microsoft Dynamics CRM Online and replace <OrganizationName> with Your Unique Org name.
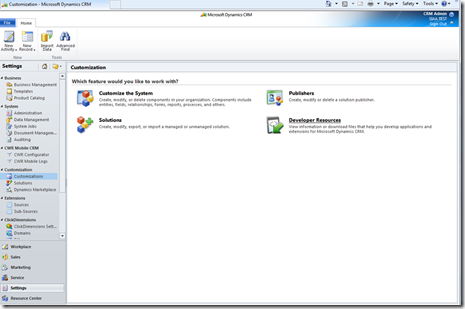
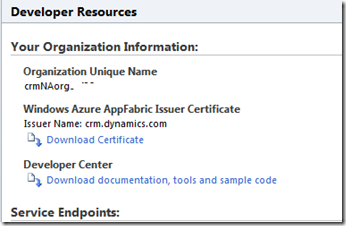
- You can find your CRM Online Unique Org Name by going to Settings, Customization, Developer Resources and copy the value found under the first entry, “Organization Unique Name”
- Do not replace the first part of the URL “https://dev.CRM.dynamics.com/” only replace this value <OrganizationName> with your unique organization name
- Enter the Live ID in the User Name and related password that is used by a CRM User with the System Administration role to login into CRM Online. The user name should be in the same format as that used to log into CRM, crmuser@domain.com
- Select the Incoming and Outgoing profile for each of the applicable Default configuration profiles
- Select Ok and select the Publish button in the lower right-hand corner of the Window
Test the E-mail Router
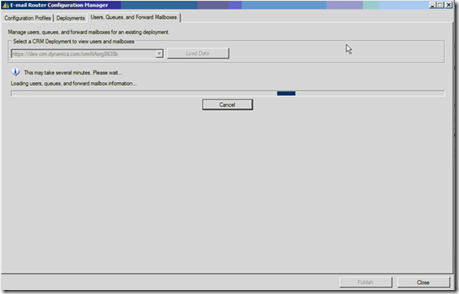
- Go to the Users, Queues and Forward Mailbox tab and select the Load Data tab.
- If all configurations are correct to include passwords, you should see a list of your CRM users when the action is completed.
- Once the Users are loaded you can select the Test Access button from the right navigation menu
Forward Mailbox
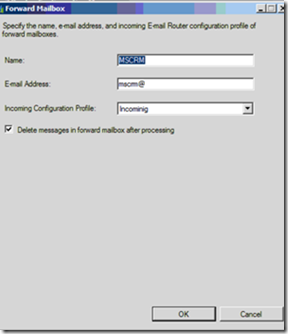
If you plan to use the Forward Mailbox to manage incoming mail, select the Forward Mailbox tab and select the New button. Enter a Name for the forward mailbox, enter the mailbox address for the forward mailbox and select Incoming.
- If you choose to use a Forward mailbox, you’ll need to change each User record in CRM to Forward Mailbox for Incoming Configuration and Deploy the Forward Mailbox rule.
E-mail Router Service
In closing, the E-mail Router Service plays an important role in ensuring the everything works as expected. Therefore, it is important that you set the logon for the E-mail Router service to a logon that has sufficient rights. To do this, ensure that the user account that is running the E-mail Router Service is a member of the Active Directory directory service PrivUserGroup security group.

