Welcome to Part 4 of this article series. In Part 1, we started off by discussing the goal of this lab. That goal is how to deploy a two-node Exchange 2010 RTM Database Availability Group (DAG) on Windows Server 2008 R2. We then prepared our Operating System with the Exchange 2010 Prerequisites which includes software prerequisites as well as modification to hardware configuration such as our Network Interface Cards (NIC)s. In Part 2, we went over the installation of one of our Exchange 2010 Servers which will include the Mailbox, Client Access, as well as Hub Transport Server Roles. In Part 3, we went over the creation and configuration of our Database Availability Group (DAG). We then added our first Node to our DAG.
In this Part, I will be adding the second node to the DAG and then create a database which will then be synchronized to the second DAG node.
Adding the second Node to our DAG
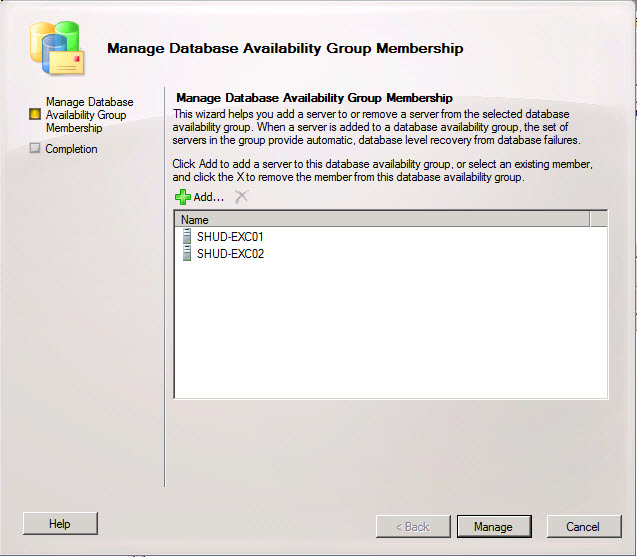
Well, let’s go ahead and add our first node to the DAG. Go into the EMC > Organization Configuration > Mailbox > Database Availability Group > Right-Click our DAG > Manage Database availability Group Membership.

Add the second Node. Click Manage to Continue.
Our second node has successfully been added.
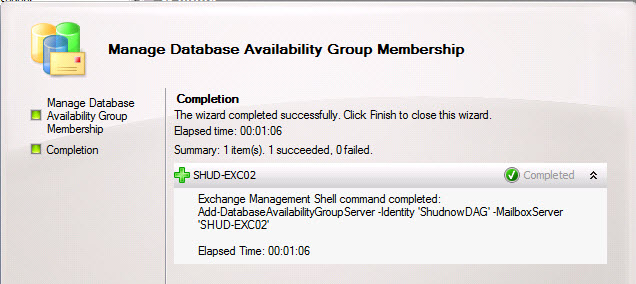
But… what exactly was done during this behind the scenes when this second node was added to the DAG? The following occurs (from Technet documentation):
- The server is joined to Windows Failover Cluster for the DAG.
- The quorum model is automatically adjusted:
- A Node Majority quorum model is used for DAGs with an odd number of members.
- A Node and File Share Majority quorum is used for DAGs with an even number of members.
- The witness directory and share are automatically created by Exchange when needed.
- The server is added to DAG object in Active Directory.
- The cluster database is updated with info on mounted databases.
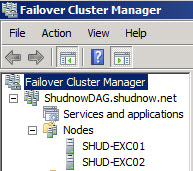
First of all,we can see the DAG has been joined to the Windows Failover Cluster.
Second of all,we can see the Quorum Model has been adjusted to Node Majority and File Share Witness because we have an even number of nodes.
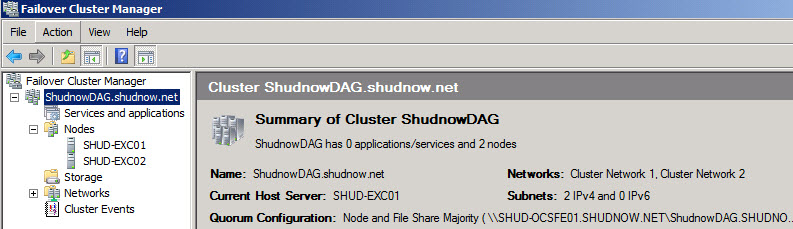
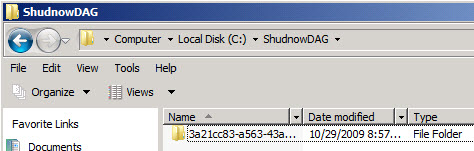
We can also see the FSW is set to the location we specified when creating our DAG (SHUD-OCSFE01 with a path of C:\ShudnowDAG) and that there is Quorum data in this location.
Adding Database Replicas
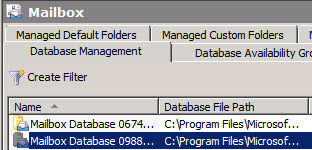
Well, let’s go ahead and create a new database and replicate it. Go into the EMC > Organization Configuration > Mailbox > Database Management.
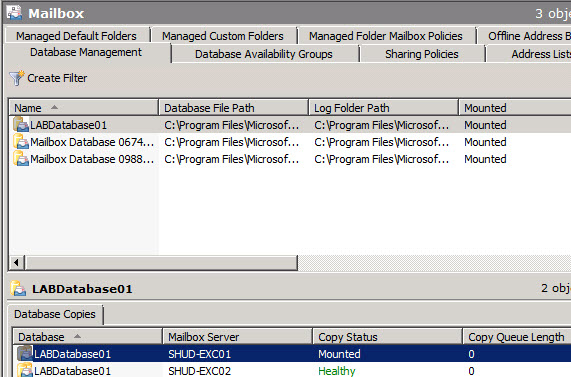
We can see there’s currently two databases that were created during the installation on our Exchange Mailbox Servers; one for the first node and one for the second node.
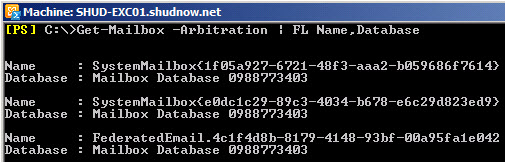
We can’t delete these databases because they contain some arbitration mailboxes. Arbitration mailboxes are special mailboxes that are used to manage approval workflows. For example, moderated e-mails. We can see these arbitration mailboxes and what mailbox databases they belong to by running the following command:
Get-Mailbox -Arbitration | FL Name,Database
Create a new Database. I will create a new mailbox database with the name, LABDatabase01. I will then also mount the database The two commands I will use to do this are:
New-MailboxDatabase -Name LABDatabase01 -Server SHUD-EXC01
Mount-Database -Identity LABDatabase01

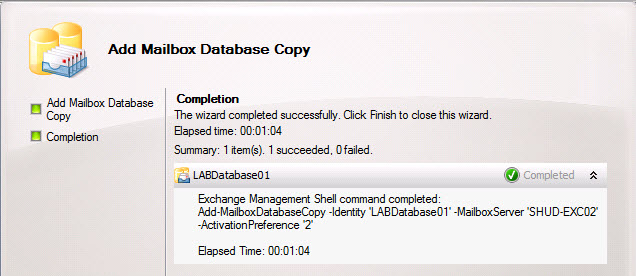
Let’s add a Mailbox Database Copy to our second DAG node so we have redundant databases. Database Management > Select the new Database > Right-Click and Choose “Add Mailbox Database Copy.”

Choose the second server for the server that will obtain our Database Copy. Click Add to Continue.

We should then see a successful copy being added to our second DAG Node.
To verify, in the EMC, click on the LABDatabase01 and we should see a Mounted copy and a Healthy copy below.
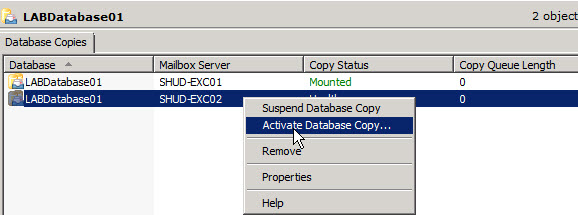
To do a switchover, you can right-click on the copied database and choose Activate Database Copy.
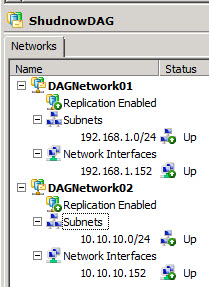
DAGs Networks
Go into the EMC > Organization Configuration > Mailbox > Database Availability Group. At the bottom, you will see the Networks. You can see both are enabled for Replication. Exchange 20/images/Exchange2010DAG54.jpg" />
We should then see a successful copy being added to our second DAG Node.
To verify, in the EMC, click on the LABDatabase01 and we should see a Mounted copy and a Healthy copy below.
To do a switchover, you can right-click on the copied database and choose Activate Database Copy.
If you were in a situation where you were adding a 3rd node to the DAG and it was in a different subnet, you will need to add an IP Address for that subnet so the Network Name resource can come online for that subnet. So let’s say we now added a 3rd DAG node that was on the 172.16.0.0/12 subnet. Remember our Set-DatabaseAvailabilityGroup cmdlet with the -DatabaseAvailabilityGroupIpAddresseses switch? In this case, let’s say 172.16.2.154 was going to be our DAG IP for that subnet. We would have to add that IP to the switch above. But that switch is not additive, so we would have to run the following command:
Set-DatabaseAvailabilityGroup -Identity ShudnowDAG -DatabaseAvailabilityGroupIPAddresses 192.168.1.154,172.16.2.154
As you can see, I specified both 192.168.1.154 in addition to 172.16.2.154.
What happens is if the DAG fails over to the second DAG node, the DAG will keep the 192.168.1.154 address. But if it fails over to the 3rd node, it will use the 172.16.2.154. Again, this command has nothing to do with the replication networks, only the MAPI Networks. And again, it’s only so the Network Name resource can come online which is a cluster dependency. No clients will connect to this Network Name resource and Exchange has multiple mechanisms to connect to Exchange.
Summary
Well folks, that is all for Part 4 of this article as well as the article series. Thanks for reading!