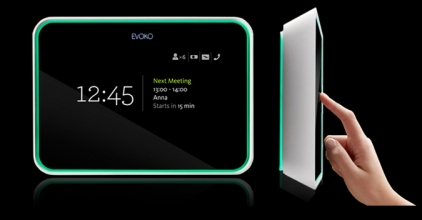
The Evoko Room Manager simply consists of an 8″ touch-sensitive screen that is placed on the wall outside of the meeting room, connected to the company Exchange Sege no-wrapper" id="fragment-6615">
Office 365 – Room resource - Room manager (Evoko) installation
Before you create a room resource/mailbox, create an user who is going to get accept and decline the booking on behalf of the Room mailbox. Remember one thing is that this Room resources does not have any portal to manage the booking as it gets and someone has to accept it on behalf of the resources.
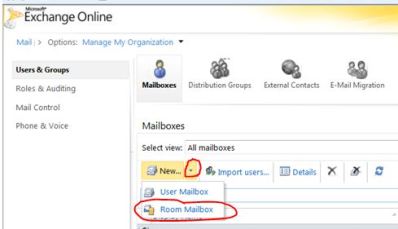
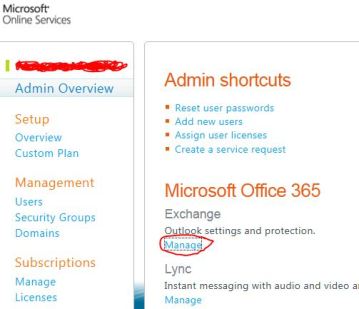
Inside the Exchange manage portal, Select new and select “Room Mailbox” (Room mailbox does not allocate license from Office 365)
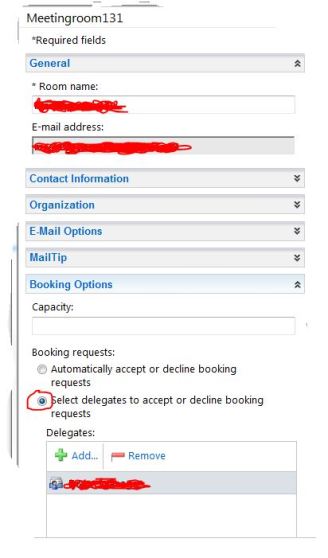
Then create the resource with the name as required and select the “select delegate to accept or decline booking requests” and then add the user dedicated to this task.
- When you create the delegate user, make sure that the primary email id is same as the domain which resource belongs to. (Some time you have more than one domain hosted in the O365 portal)
- If the primary email Id is wrong, you can change it by Office 365 power shell command utility to achieve this task
- At the PS command, type Set-Mailbox – Identity <room mailbox name> -WindowsEmailAddress <new room mailbox email address>
- Eg: If the meeting room email id created as default meeting123@contoso.onmicrosoft.com and you want to change it to meeting123@contoso.com then the command should be
- Set-Mailbox – Identity meeting123 -WindowsEmailAddress meeting123@contoso.com
- After creating the room mailbox, assign the Full permission to the delegate user by using O365 Powershell command
- Add-MailboxPermission -AccessRights FullAccess -Identity <room mailbox name> -User <delegate user name>
Its now good to go for production.
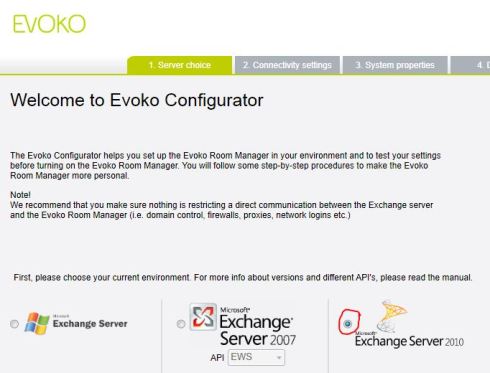
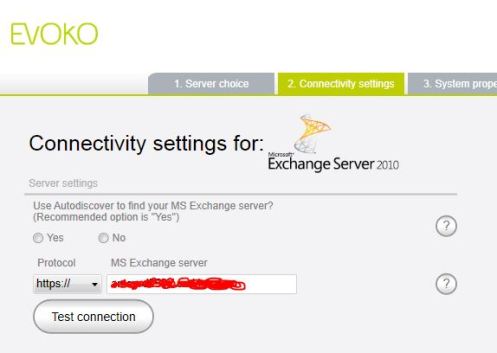
After you download Evoko configuration software, configure the software for Office 365 as shown below
Here the server name, you can get it from the Outlook properties or from OWA
Click the “down arrow button” and select “About” and you will find the server details under Host Address. (remove the /owa from the information while typing)
When you click the Test connection, if you get success (a green tick mark), you are good to go to dashboard to configure the Room manager screen from EVOKO
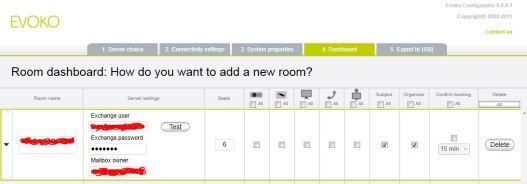
In the above screen, which is from EVOKO dashboard,
- Create a “Room Name” (A meaning full name for your information).
- Then enter the Exchange user : This should be the delegate user, assigned to the room mailbox.
- Then password: Delegate user password.
- Then type the Mailbox owner: This is the email id of the room mailbox.
- Click Test.
- If your account settings are correct, you will get the green tick mark.
Once it is done, export this configuration to an USB disk and then connect the USB to the EVOKO room manager screen and then upload the configuration as described in the EVOKO system administrator guide.
Once the installation is completed, and when you assign a meeting request from your Outlook, Evoko Room manager screen will show the display of your content with specific time. But certain time, your name will appear twice and will not show the “Meeting Subject content”
- If you want to fix this issue, use the Office 365 Power Shell command and do the command ae a “Room Name” (A meaning full name for your information).
- Then enter the Exchange user : This should be the delegate user, assigned to the room mailbox.
- Then password: Delegate user password.
- Then s follows.
- Set-CalendarProcessing -identity <room mailbox name> -AddOrganizerToSubject $false – DeleteSubject $false.
- Here above $false means “show the subject on the device”.
Enjoy!!!

