The Microsoft Forefront Online Protection for Exchange (FOPE)
provides a portal for configuring and administering FOPE usinpam, malware, and policy violations. FOPE also helps simplify the management of your email environment and
can alleviate many of the burdens of software and hardware maintenance.
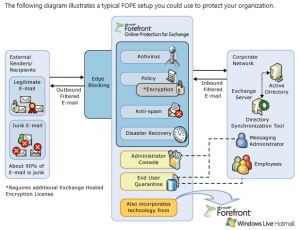
Forefront Online Protection for Exchange. FOPE, currently in version 11.1 (as of 17th March, 2011), provides anti-spam and antivirus protection for Office 365 mailboxes within your organization.
After this update on the 17th March, FOPE enhanced service update on the 13th of May 2011, then FOPE enhanced search update on the 29th of August 2011 and recently on the 22nd of March2012, released “Security enhancement fir Outbound Preference BCC feature
may impact outbound BCC functionality”
This information is as of 18th April 2012.
Accessing FOPE Settings
To get into the Office 365 Admin Console and you will never find the FOPE settings.
To get into the FOPE admin panel, you have to log in as cloud administrator (this information is for to update the domain level changes)
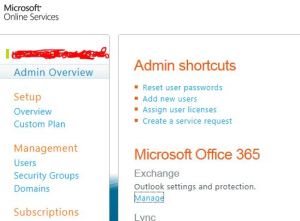
Once you logged in, under the Admin panel, you will find “Exchange” and click “Manage”
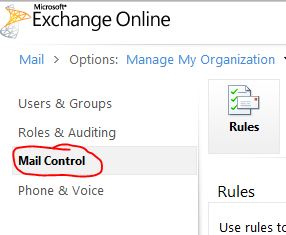
From the above pannel, Click “Mail Control”. In this page on your right hand side you will “Configure IP safelisting, perimeter message tracing and e-mail policies” Click there (as below)

Once you click this option, Microsoft Forefront Online Protection for Exchange (FOPE) administration portal will open.
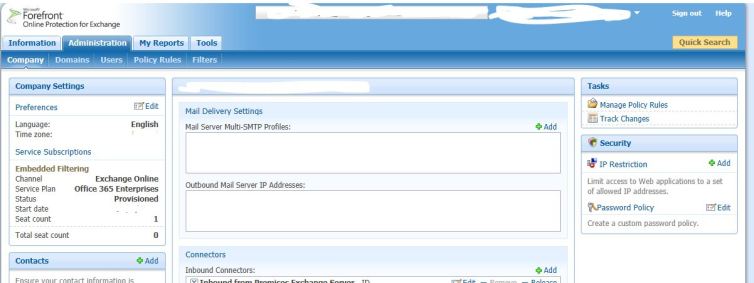
Information Tab: The first tab you should select once you are looking at your FOPE portal is the “Information” tab. From here you can see graphical visualizations of the organization and network filtering analytics. Announcements are also
included on this tab, and you’ll receive alerts about any service updates and enhancements.
Administration Tab: This is the important tab where you will configure the FOPE for your hosted domain(s) under Office 365. Under this tab you will find sub domains.
- Company—On this tab, you can update your company-wide settings, including the following:
- Default language and time zone settings
- Contacts
- Company security settings
- Hosted Archive settings
- Domains—The tools on this tab allow you to view and modify domain-level settings for each domain in your company. Additionally, you can edit domain setting options for your Hosted Filtering service, domain-level retention periods, and domain-level
Legal Hold settings for your Hosted Archive service.
- Users—On this tab, you can manage all of the user accounts for your hosted services. From the tabs on this tab, you can create and delete user accounts, change passwords, assign permissions, and modify user account service settings. You
can also edit user-level retention periods and user-level Legal Hold settings for your Hosted Archive service.
- Policy Rules—On this tab, you can create new policy rules for your domains, and update Hosted Filtering and Hosted Archive policy rules.
- Filters—The tools on this tab allow you to add and manage large lists of values, called Dictionaries, for policy rules.

To create any Policy, better you maintain a dictionary. Dictionary is nothing but the .TXT file, which contain your existing blocked ip, blocked sender domain, blocked keywords, blocked subject etc import it from your existing Exchange server or legacy email
server. Once you have those list, maintain/import each seperately (eg: IP block list import seperately to .TXT format, Keyword block list import seperately to .TXT format etc)
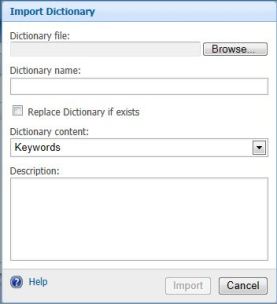
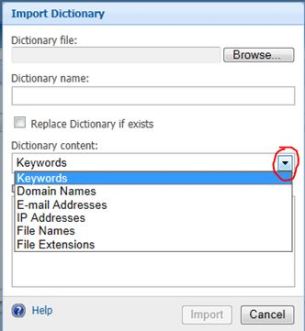
Once you have this as a .TXT file in your local machine, maintain it properly. This will be used for later sage. Go to “Filter” Tab and click “Import Dictionary”, which is shown as above image. you will get a menu like below.
- ked ip, blocked sender domain, blocked keywords, blocked subject etc import it from your existing Exchange server or legacy email
server. Once you have those list, maintain/import each seperately (eg: IP block list import seperately to .TImport the file you want by clicking “Browse” on the “Dicrionary file”
- Create a meaningful name for the importing dictionary (eg “Keyword”)
- Dictionary content consists of pre-defined sets where you have to tell the FOPE that where it is going to apply. Keywords are shown as above.
- Description is nothing but a meaning ful deatils (eg: Blocked Keyword uploaded on the 18th of April 2012) etc.
Once this is done, you are good to go for policy creation.
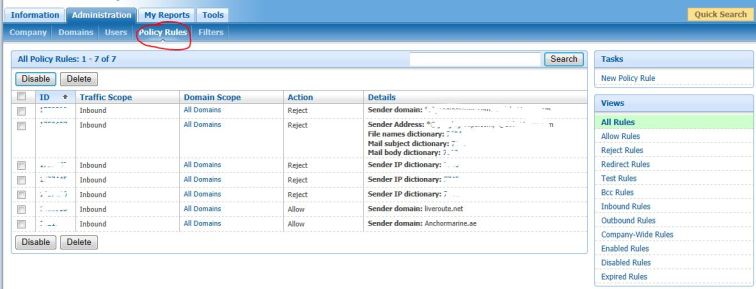
NOTE: New rules take effect approximately one hour after they have been saved.
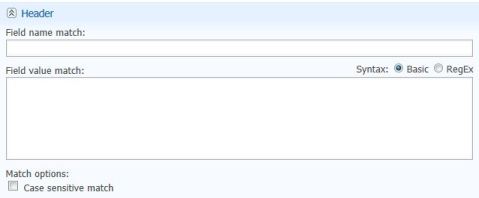
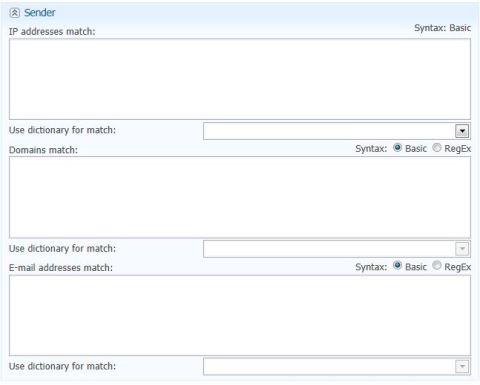
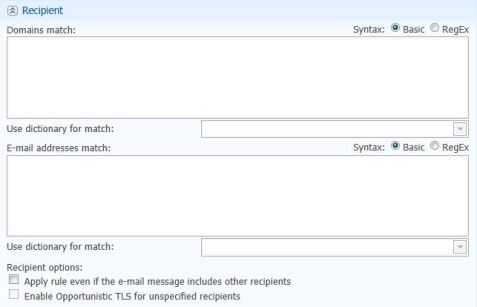
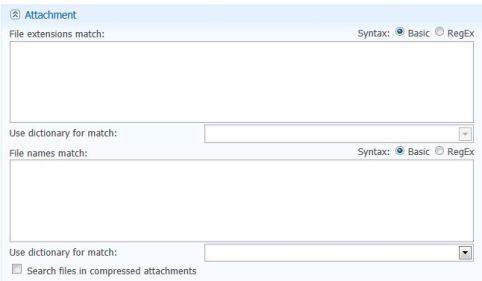
Goto “Policy Rules” and click “New Rule”… Here the Match Policy Rule consists of few blocks
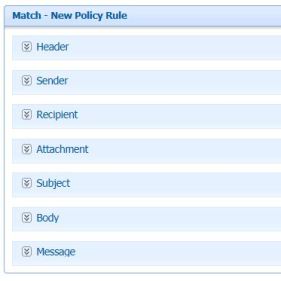
- Header Policy
- Sender Policy
- Receipient Policy
- Attachment Policy
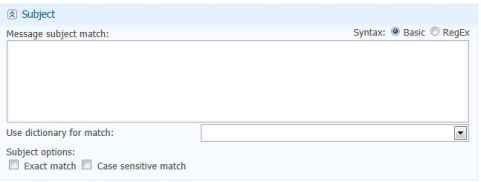
- Subject Policy
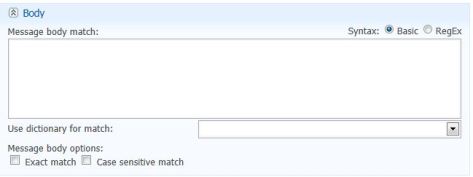
- Body Policy
- Message Policy
Header Policy
Sender Policy
Receipient Policy
Attachment Policy
Subject Policy
Body Policy
Message Policy
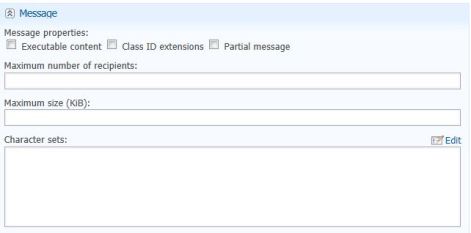
Now with all these match policy settings, you have to create the policy(if necessary) and attach the dictionary corresponding to the field where it mentioned “Use dictionary for match”.
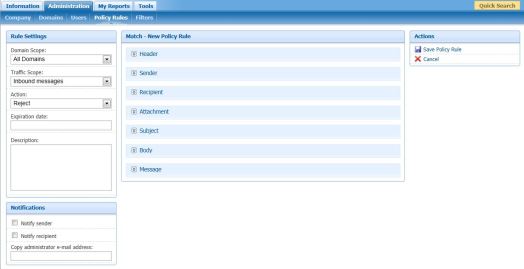
Now lets talk about the Left part of the column which is “Rule Settings”. Each rule which you create, you have to fill up those column as well.
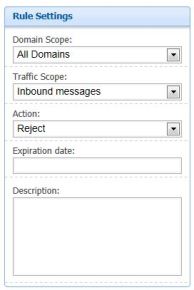
The first part “Rule Settings” which specify the scope of how you want this policy to be placed, which is self explanatory.
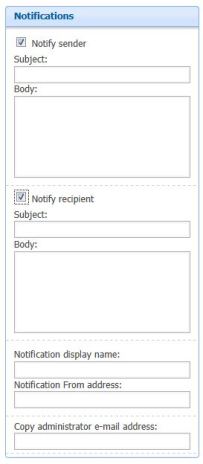
The second part “Notifications” which need to look throughly.
- When you select “Notify Sender” you have to mention a meaning ful subject “eg: Suspect Mail – Mail Server IP Blocked” so that the sender is notified with intimation.
- When you select “Notify Receipient” you have to mention a meaning ful subject “eg: Suspect Mail – Mail Server IP Blocked” so that the receipient is notified with intimation for further action.
Now the third part which is for administrative side.
- “Notification display name” : which is nothing but the subject which you want to notify “eg: Suspect Mail – Mail Server IP Blocked”
- “Notification From address”: which should be a valid email id to send “EG: FOPEalert@contoso.com”
- “Copy administrator e-mail address: IT/FOPE administrator who monitor the event.
Once this is set, Click “Save Policy Rule” and you are good to go. Remember each new policy you need to mention this parameters.
Once this is done and when ever any inbound email gets rejected because of your policy settings, Sender will get notified, receipient will get notified and then the administrator will be notified.
For administrator email, which is totally different from sender/receipient. What he/she gets is the details of the policy which has taken action. See below copy for your information
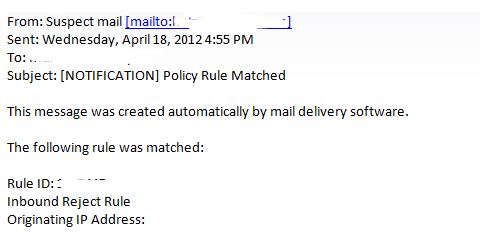
The above administrator email from FOPE contain
- Meaning subject.
- Rule ID which took action.
- Body to analyse the content, with originating IP.
Now if this is a genuine email, you, as an administrator needs to take action. Otherwise just ignore it.
For action part,
- You have to edit the original .TXT file which you import for the corresponding Rule ID.
- Open it and remove the value and then save it as same file.
- Just import the dictionary again.
- This time, please check mark “Replace file, if exist”.
- Doing this, we do not need to change the Rule again.
Thats all folks…Enjoy!!!
If you need more info about Office 365 installation,
Office 365 - All you need to know


